Posts

Reflection

Image
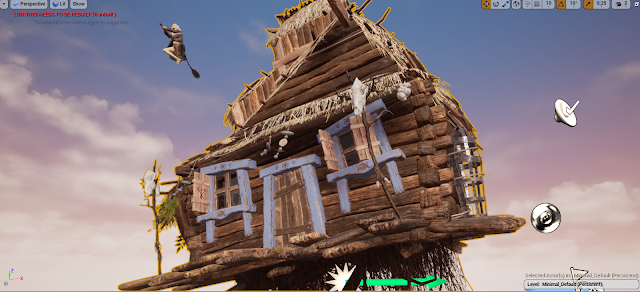
It was a great project, and I learned plenty of new skills and methods of work. I consider this project to be successful; I mostly managed to achieve what I established in the proposal document. I think that I will never be entirely pleased with my work; however, I believe that what I have created meets the industry standards and works well in the engine. Now at the end of this project, I can see all the mistakes I have made, and ideas of how to fix them. In the beginning, I knew that I want to create a chicken leg house; however, I was really struggling with the decision of how to approach this. I was somewhere between the character and environment art, and I wasn't sure of what to stick to. This led me to have a project that is somehow between the two, but more towards character art. My initial idea was to make a house as a centrepiece of the environment. However, after the feedback that I received and my thoughts, I decided to go for the character art. My idea was to create a s...

Particle Effect

Image
The last step of the presentation was to create a particle effect. To reinforce the effect of the heaviness of the house, I wanted to add particles that are following from the bottom part of the house, whenever it makes a step. This effect contains three different objects. First one is a 3D sphere with a simple brownish material, the second one is a stick with an alpha map for transparency, and the last one creates subtle dust particles, and it also has an alpha texture. particles and materials particle types There are three particle emitters, one for each object. The base for each object is a cylinder. I set up the amount, duration and rotation, which differ for each object. The most important part of this effect was to set up the time when the amount of particles increase. It had to follow the animation, so I had to set up the times correctly to make the soil pieces drop with every step. I also extended a duration time, so when they hit the floor they stay there for a...

Clothing system

Image
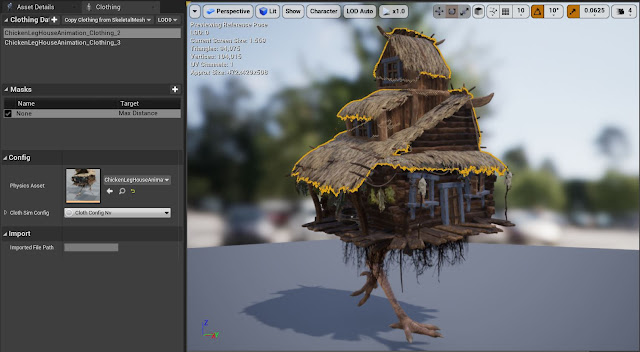
Since I started the animation process, I was wondering how to animate roots and roof. At first, I wanted to add bones and make the standard animation, but this could be a harrowing and long process since I find it hard to animate the object like clothing or hair. I received a piece of advice that I could use a clothing system inside the Unreal Engine. Applied to the object, it simulates the natural movement of the clothing, and it works together with the animation. This way, I can work way more efficient, because it is fast and rather easy. To use the clothing system, I had to keep roof and roots on separate materials because this is the only way to use section selection and select a certain part of the model in order to apply clothing. section selection tool Next part was to the clothing system. It was applied for roof and roots separately because this way is easier to control it. To make it work, I had to paint the clothing data on the model. It was a bit similar to painting we...

Props 2

Image
Since I have been given more time to work on the project, I decided to add some more props to the House to add something to the storytelling part. The sides of the House are a bit empty, so I created container, bucket, cauldron and a metal cage to give the viewer some clues of what Baba Yaga might do when she's not flying on her broomstick. A cauldron is a typical Baba Yaga equipment, so I wanted to include an old rusty one, but there is also a metal cage where she can detain people. Props are attached to the House with ropes, so they don't move when the House is walking. I started by making a low poly version of each prop, and I unwrapped them keeping everything on one UV map. Knowing that these props will not be in the centre of attention, I decided to sculpt only the wooden parts in Zbrush while adding the normal details to the metal in Substance Painter later on. Using metal and wood smart materials mixed with some smart masks to make the models look old and used. prop...

Engine Implementation

Image
I decided to use the Unreal Engine for the purpose of this project. I found it very easy to use, and the post-processing effects applied by default helps to make the textures and colours looks more define and pleasing to the eye. In terms of the style I was going for realism mixed with stylization, so I went for a PBR based material to make the model look a bit cartoony. I think that Unreal does a better job than Unity in terms of PBR based textures and realistic look of them, so for me, it was an obvious choice. I exported Baba Yaga and the House as separate models since Baba Yaga's animation is a bit longer than the House. There was nothing complicated while exporting the models to the Unreal, I had no errors, but there were still things to be done in the engine to make it all look spot on. The first part was to create all materials and assembly them correctly. Because of the different properties of some parts of the model, I had to make separate materials for each par...

Baba Yaga rigging, skinning and animation

Image
Baba Yaga is a secondary part of the project. She is an additional part, I wanted to show the occupant of the house as well. I wanted her to work as a satellite for the house, so she flies around on the broomstick. Her animation is less complicated than the house, so as the rig. I created a very simple human rig with additional bones for the hair and skirt, because I wanted the whole body to move slightly while flying. I did quick skinning because in this case, it was not crucial for me to deform all parts of the body correctly. I focused mostly on head, arms and legs since these deforms the most. The main part of the animation was to create a path that Baba Yaga can follow. I was trying to use a spline method where I can attach the model to the spline and make it follow the desired direction, however, I had a problem to make it with the skinned object that has bones inside. It was working perfectly fine for the model itself, but it did no...

Baba Yaga texturing

Image
I decided to create the texture for Baba Yaga in Substance Painter. I was thinking to use Zbrush polypaint method, but Substance allows me to quickly add some normal details to the clothing. I wanted to achieve old, worn-out clothing with frayed edges. Baba Yaga is a very old witch, so I decided to keep an unhealthy, aged look of her skin. Textures are not very detailed, because she is not the main point of the project, and she will continuously be flying around, so it would be hard to spot fancy details. To exaggerate the fact that she is a witch, I made her eyes black, with no iris. However, I am not entirely convinced with the look of it, so I may change her eyes to look blind. In Substance Painter, I added an opacity channel to be able to work with opacity maps and add jagged edges. For the skin and clothing, I mostly used a variety of smart material, with major adjustments. Baba Yaga texture layers  Details Baba Yaga textures UV unwrap For the hair a...